From Prompt to Production: Windows/Gemini Edition
Vibe-coding and testing local web apps, and deploying with GitHub and Vercel
Part of the Artificial Intelligence series

If you've found my previous tutorials and articles helpful, then this post might not be for you. It's ok, you can keep reading. But I'm taking a break from Claude Code and Mac to see how the other half vibes.
In this guide, I'll be using Windows and Google Gemini's CLI to vibe code an app from prompt to production. And I must warn you, I'm new to Gemini, and I haven't used Windows in years! I'll be figuring this one out as I go, and I'm sure I'll make a few mistakes, especially around the Windows PowerShell stuff. Please feel free to drop a comment below or DM me if anything goes against best practices or just grinds your gears. Not really sure what I'm doing here. Let's see how it goes!
This guide will cover:
- Installing Dependencies: Node, npm, Git CLI, GitHub CLI
- Installing Google Gemini CLI
- Vibe-coding and testing local web apps
- Creating a Repo and pushing local changes to GitHub
- Deploying website to Vercel
- Vibe-CI/CD: Vibe code changes, push to GitHub, update site
This setup will provide the AI coding tool, website hosting, backup, and version control- all using free services. So you can vibe code all the apps you want for free, and only pay if more hosting resources are needed.
This is a follow up to my previous post on vibe-coding with Claude Code on Mac.
Installing Dependencies
Before we jump into installing everything, let's take a quick look at what all is required, and why:
| Requirement | Purpose |
|---|---|
| Node.js v18+ | Required by Gemini. Runtime to execute JavaScript outside the browser. Also used to build and test web apps locally. |
| npm (node package manage) | Installs and manages dependencies for Gemini, and other tools as needed during development. |
| Git | General CLI utility for all Git based services (GitHub, GitLab, BitBucket) for backup and version control |
| GitHub | GitHub-specific API and Auth functions |
| You'll also need a Google and GitHub account to follow along. For this guide, I'll be using Vercel to host the website. But you can use Netlify, CloudFlare Page, GitHub Page, or any other hosting that auto-deploys from GitHub. |
Lastly, you should choose a text editor to use with Git. You can use Vim in the terminal, or the Windows Notepad app, but an editor like Sublime or IDE like Visual Studio Code would be easier to use. For this guide I'll be using Sublime. It will help during the Git install if you already have your text editor or IDE installed.
Installing Node.js
Download and Install Node.js for Windows. The installer will also install npm, and it will give you the option to install Python, Chocolatey (Windows package manager), and a few other tools. Most of the extras will come in handy while vibe-coding your web app, so go ahead and install everything.
Verify installation
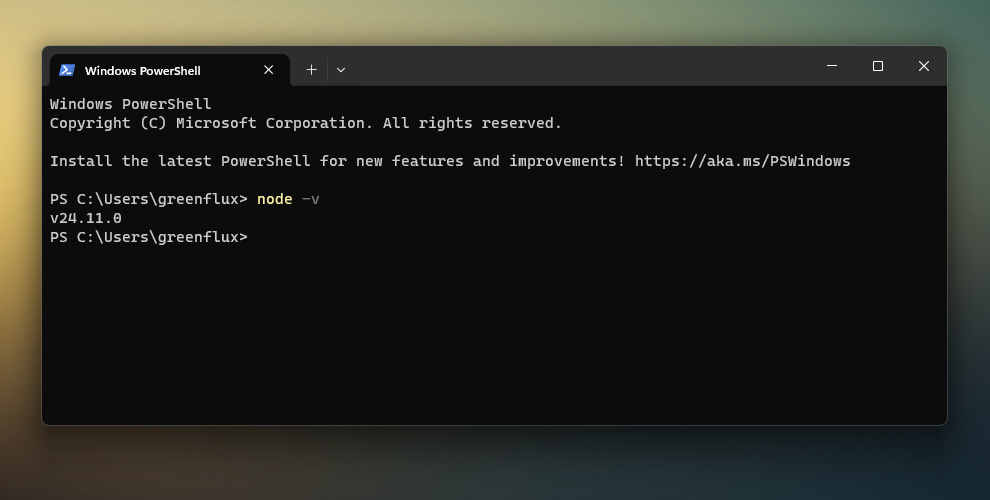
Next, open PowerShell and verify the installation by running: node -v
This should return v24.11.0 or higher.
NOTE: You may have to quit and restart PowerShell, or reboot before Node is available in PowerShell.
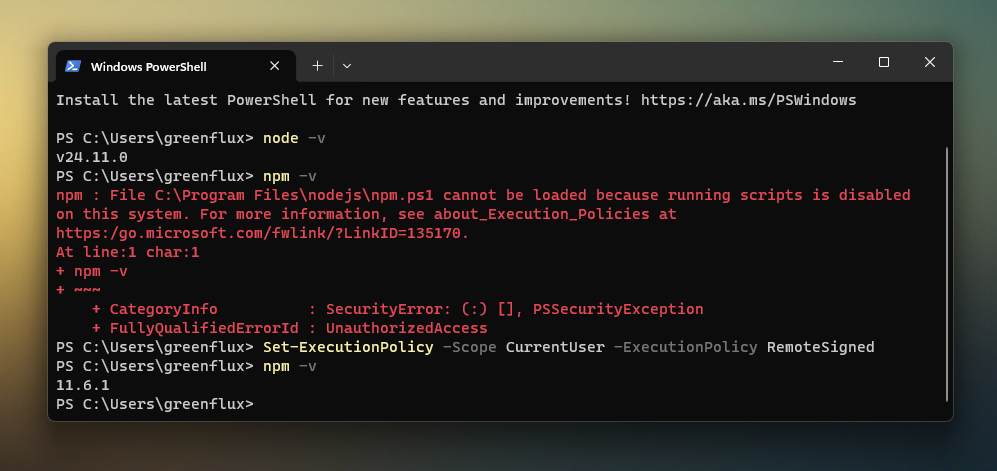
You can also verify the npm install with npm -v. However, it won't be able to run until you enable execution of remote-signed scripts in your execution policy. This must be manually enabled before you can run scripts from local or downloaded sources.
In PowerShell, run:
Set-ExecutionPolicy -Scope CurrentUser -ExecutionPolicy RemoteSigned
This should enable RemoteSigned script execution. You can verify it by running:
Get-ExecutionPolicy -List
 Note how
 npm -v failed to run at first, and the error mentioned the execution policy. After enabling RemoteSigned, npm -v should return 11.6.1 or higher.
Installing Git & GitHub
Next, install Git for Windows. This is the general Git tool for working with any Git-based service like GitHub, GitLab or BitBucket.
During the install, enable the option: Add a Git Bash Profile to Windows Terminal
This will enable Unix-like commands, like grep, ls, etc.
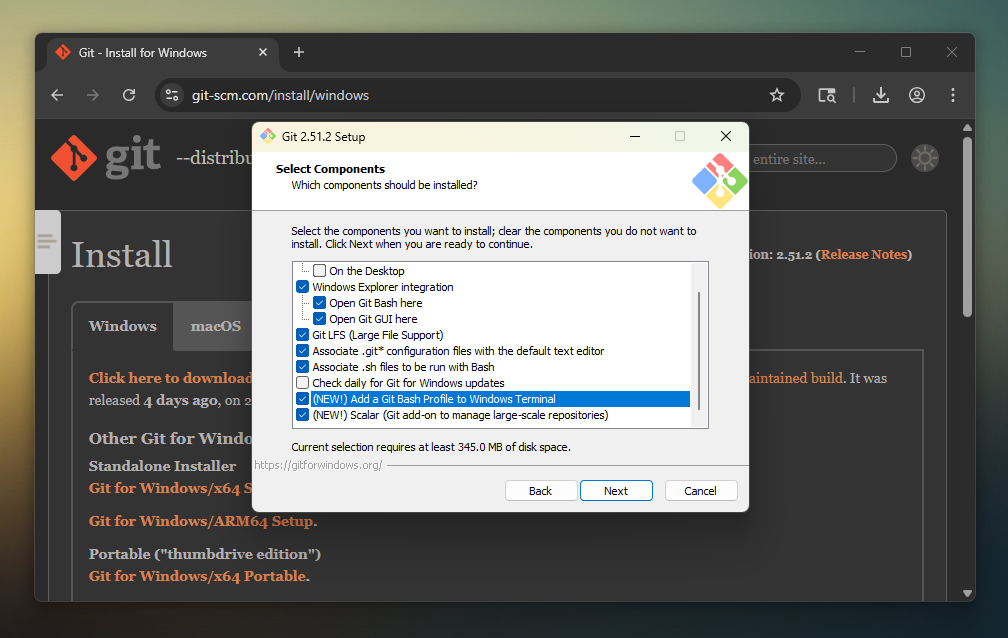
Continue with the installer and keep the default options on the next few screens if you aren't sure what to choose.
Verify Git Install
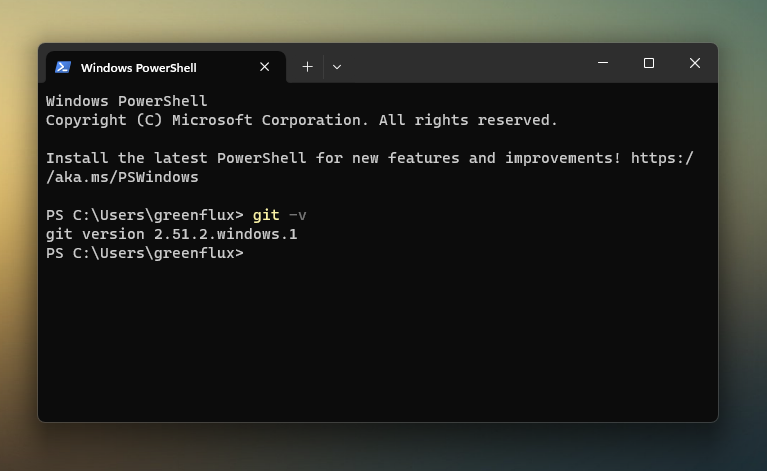
Once the install is complete restart PowerShell and verify the installation with: git -v
You should see version 2.51.2.windows.1 or later.
Install GitHub for Windows
Lastly, install the GitHub CLI for Windows. After the install, restart PowerShell, and then login to your GitHub account by running: gh auth login
Choose the default options on the next set of prompts to login with GitHub using HTTPS and using the web browser. After selecting the last option, you'll be presented with a one-time code.
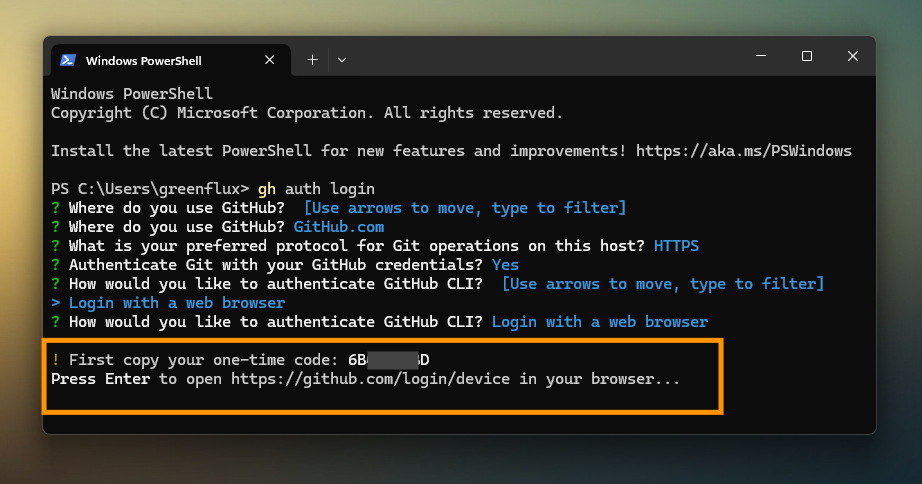
Press ENTER to open github.com/login/device and login to GitHub, then enter the code.
NOTE: You should be prompted to verify the login with two-factor authentication. If you don't have it enabled, now would be a good time!
Once you login and enter the code, return to the PowerShell window, and you should see a message confirming that your local GitHub CLI is now logged in.
Ok, the dependencies are finally installed! On to Gemini.
Install Gemini CLI for Windows
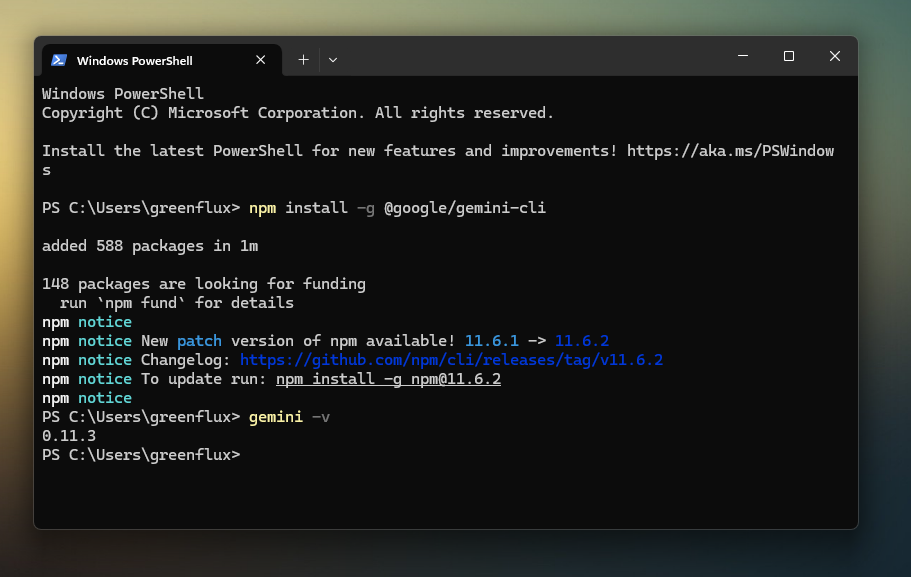
Now we'll install Gemini CLI using npm.
Open PowerShell and run:
npm install -g @google/gemini-cli
Give it a minute to install. Once finished, you can run gemini -v to verify.
Alright, we're finally there! Time to start vibing!

Creating a Project
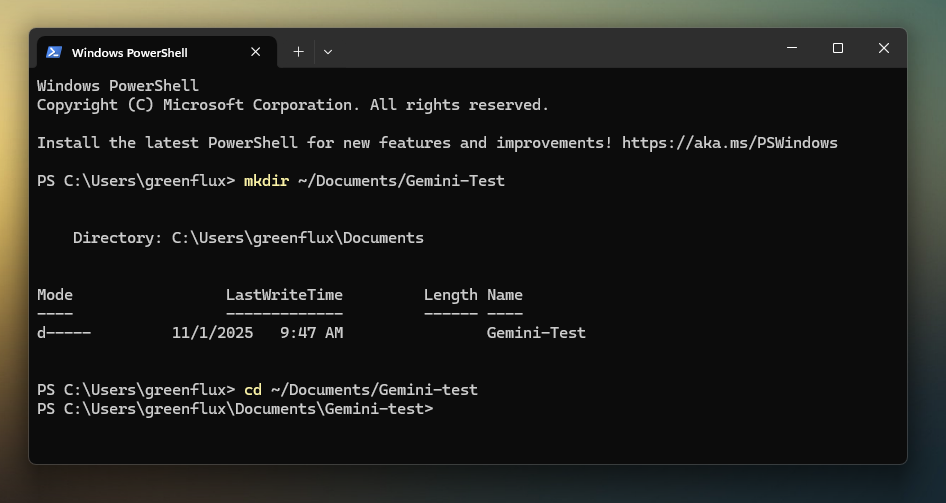
Before we start up Gemini, it's best to create a new folder and isolate Gemini to running in the new empty directory. You don't want to open PowerShell and run Gemini directly because it would have access to your entire user directory or wherever your terminal happens to be.
Create a new folder from PowerShell, and then navigate to it.
mkdir ~/Documents/Gemini-Test
cd ~/Documents/Gemini-Test
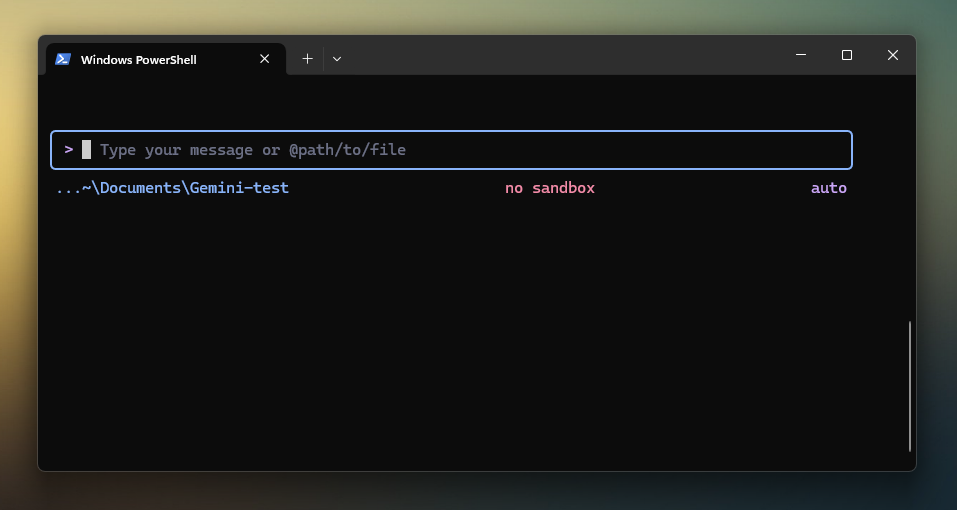
 Now you can safely start up Gemini. Simply type
 gemini in PowerShell. On the next prompt, hit ENTER to login with Google.
You should see a popup to approve Node.js and a new browser window open to login to Google. Login, and then return to PowerShell.
At this point, you should see a prompt from Gemini to start chatting.
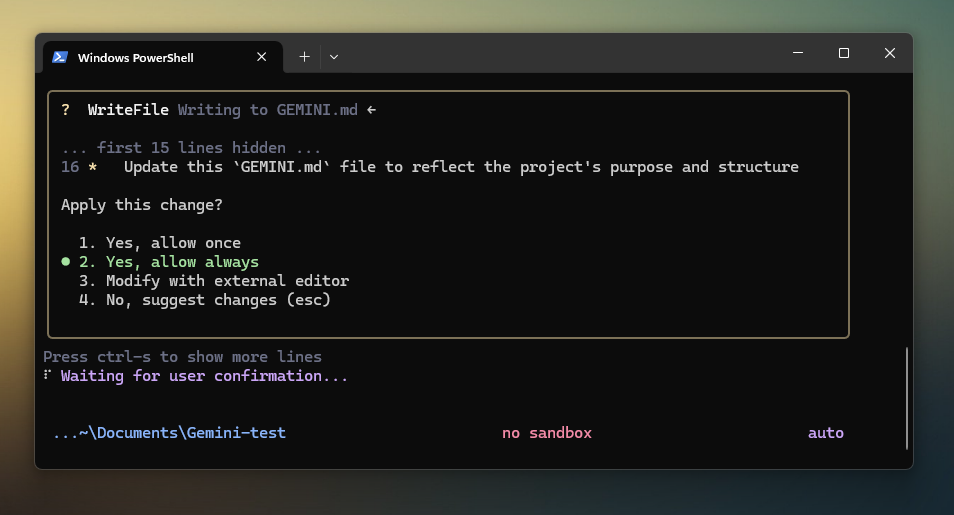
Start out by running the /init command. This will scan the current directory and create a GEMINI.md file to describe the project. We're starting from scratch, so there's nothing to scan yet, but if you're working on an existing project this will initialize it with instructions in the GEMINI.md file.
Gemini will scan the folder, then ask for permission to create the new GEMINI.md file. You can approve for this one time, or always allow for this project.
Ok, now try entering a prompt, and asking Gemini to build a simple website. Avoid anything with user login or a database for now. We just want to get a working site so we can connect it to GitHub, then deploy to Vercel. From there you can continue to add features and vibe-code any app you want.
Here's the prompt I'm using for this guide:
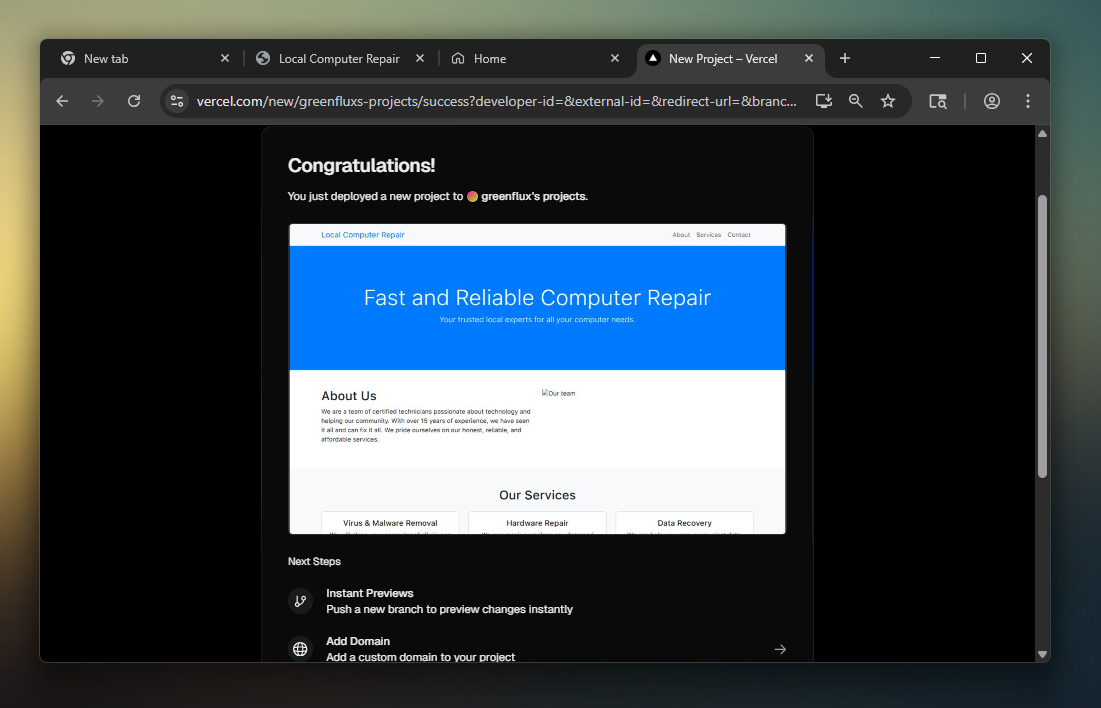
build a single page website for a local computer repair shop. Make up an about section and contact info and any other mock data. Use monochrome icons (no emojis), and a light theme with blue brand color.
Run your prompt and give it a minute or two, then you should see it ask for permission to create the new files, unless you chose always allow last time. Open up the Project folder and you should see the new index.html file, along with any related files based on your prompt.
Open up the index.html file to test out the new site.
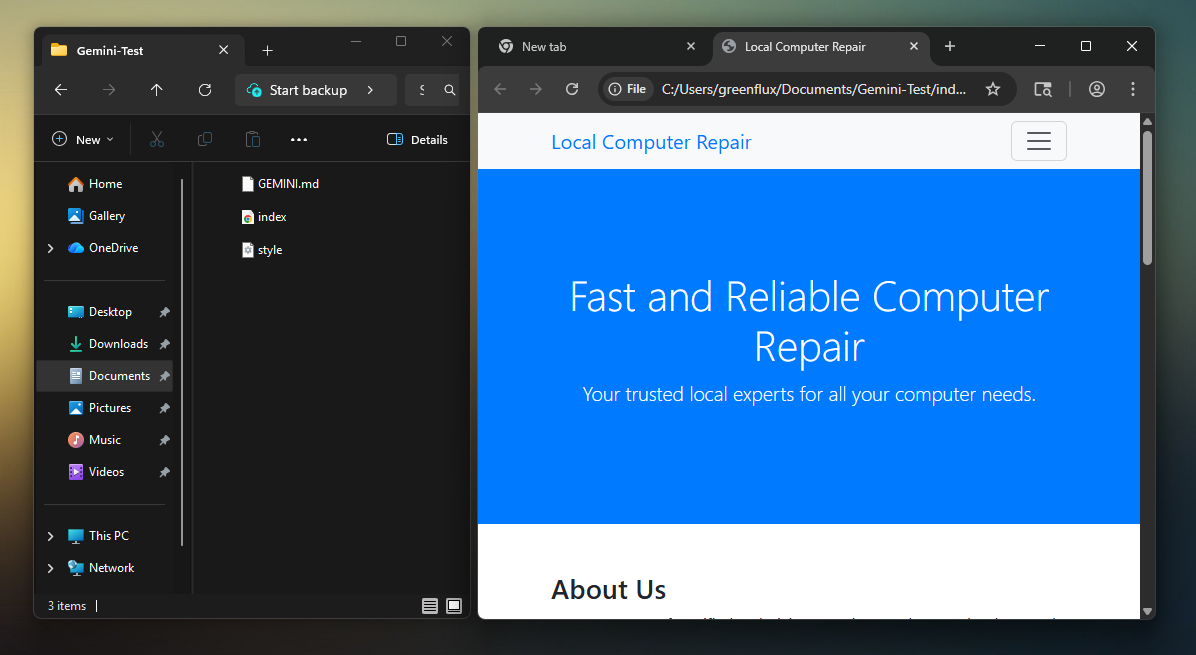
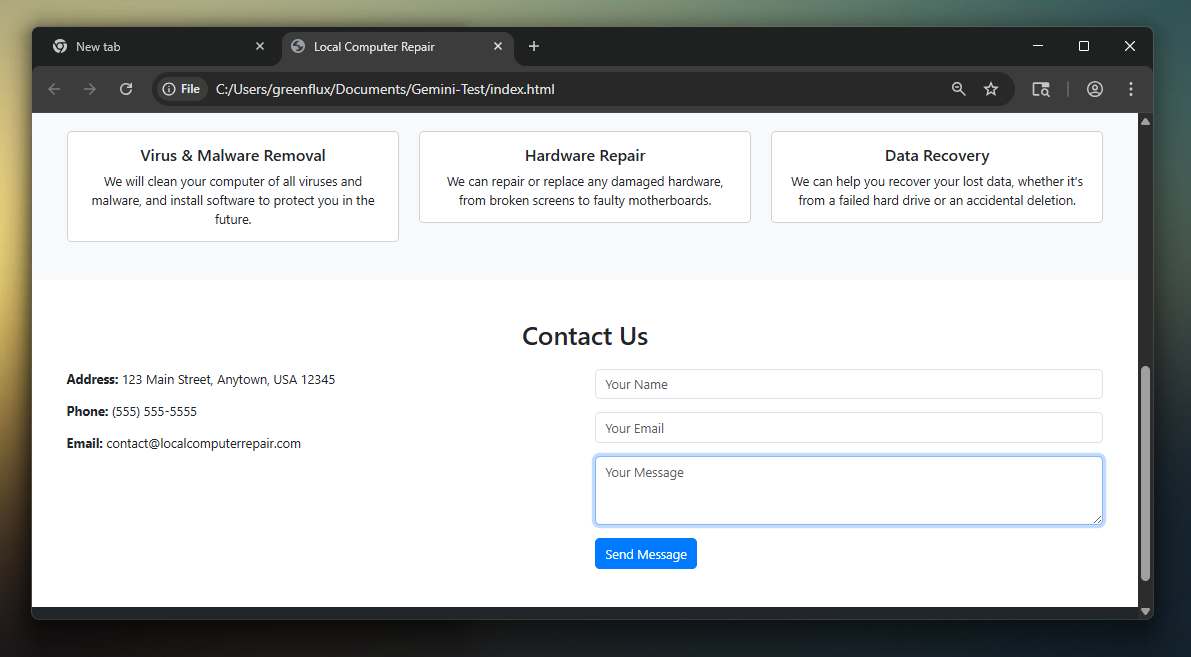
Look at that! From prompt to working website it one shot!
Now, you can continue to chat with Gemini and update the site. But for now let's move on to connecting GitHub.
Connecting Project to GitHub
Earlier we installed the Git and GitHub CLI, giving us the tools to create repos and branches, and push updates to GitHub from the command line. We can do all those things manually, or just ask Gemini and let it work out the details!
WARNING: This is one area where you don't want to choose always allow, especially if your GitHub account has access to other, more important repos. It's best to choose allow once, and read the requests from Gemini fully every time before approving.
Try this prompt to create a new private repo:
I have git and gh installed and logged in. Create a new private repo and push this project to GitHub.
Read each request carefully and click allow once for each one. You should see the following:
- git init (initialize Git for this local folder)
- gh repo create...
- git remote add origin https://...
- git add .
- git commit
- git push -u origin main
NOTE: In my case, the commit failed the first time because it tried to detect my email from the local machine and failed. Then it tried a new approach with my GitHub user name instead of the email, and it worked.
Now login to the GitHub website and you should see the new repo with your website uploaded.
Deploying to Vercel
The last piece of our 'prompt to production' pipeline is Vercel. We can link up the new GitHub repo, and Vercel will auto-deploy a new version of the website every time the main branch is updated. This will create a complete CI/CD pipeline (Continuous Integration / Continuous Deployment), and keep the vibes flowing from your local to the interwebs.
Create a free Vercel account, and then click Add New > Project, or go to: vercel.com/new
If this is your first time using Vercel with GitHub, you'll have to connect your GitHub account.
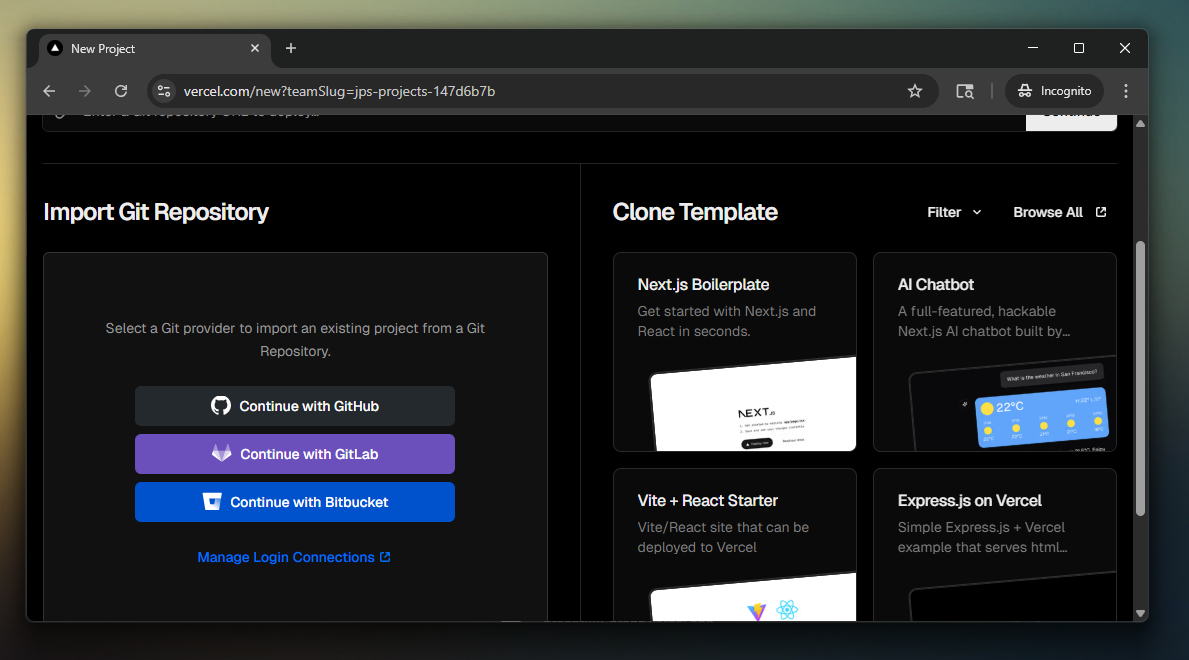
Once your GitHub account is connected, it will list the repos from your account. Click the import button on the new repo that Gemini created. You can adjust the build settings and environment variables for more advanced projects, but for this example we can just leave everything on the default values.
Click Deploy, and Vercel will start building and hosting your new website.

Vercel will automatically assign a subdomain (PROJECT_NAME.vercel.app). You can edit the subdomain name, or connect your own domain in the project settings.
Click on the preview to go to the live site. Then go to the project dashboard. Vercel will give you a different URL for each deployment, and then a production URL that always shows the latest version of the main/master branch.
Keep on Vibing
With Vercel connected, you can now go back to vibe-coding the site with Gemini, asking it to push updates to GitHub periodically. And you'll be able to roll back changes using GitHub now, if needed.
Here are a few things to try next:
- Drag screenshots or files into the Gemini terminal chat to reference them. It will insert the file path, and Gemini will be able to use the images or other files as extra context.
shift+tab: Toggle auto-accept edits mode. Turn off for chat-only, to plan between edits./: type a slash to see the list of slash commands/clearorctrl+L: clear the terminal history- Update the GEMINI.md file with special instructions for your project (or ask Gemini to)
- Make some changes and push to GitHub, then ask Gemini to roll them back, and verify site is restored to old version!
- Start a new project from a cloned GitHub repo
Watch out for bad vibes
There's a lot I could say about vibe-coding and security, but this post is getting pretty long already. So instead, I'll leave you with a few cautionary tales.
-
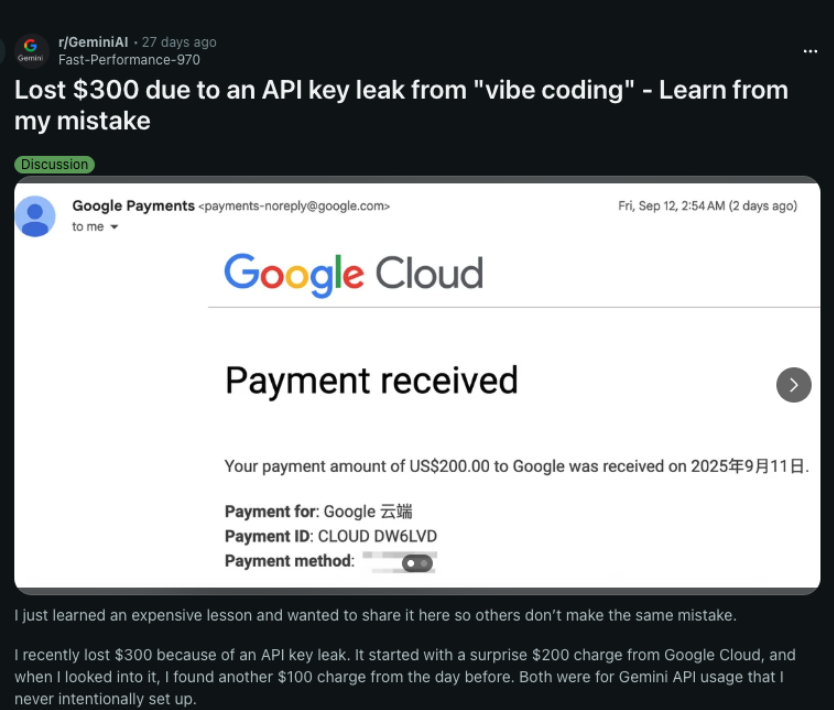
One Gemini user got off easy when he only lost $300 when his API key was leaked and used by others. It could have been a lot worse if he hadn't caught it so soon.
-
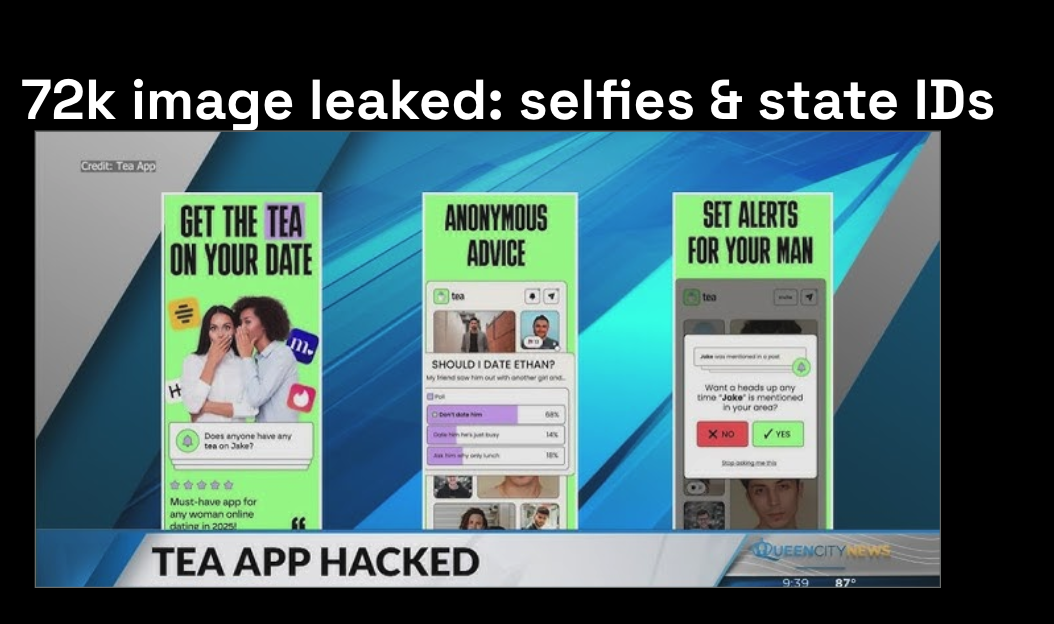
A women's app for reviewing men on dating sites was hacked due to poor security in a vibe-coded app, leading to 72k images of selfies and state ID leaking.
The list goes on, but you get the point. Publishing your vibe-coded app can have serious legal and financial consequences, so vibe accordingly.
Conclusion
Using Google Gemini CLI, you can build and test web apps locally and for free. And by connecting GitHub and Vercel, you can build a complete CI/CD pipeline to vibe-code apps from prompt to production, and without any subscription fees. This is a great way to test out new ideas, and learn by watching the changes and viewing/editing the local files yourself during development.