Validating Emails with Appsmith & the Verifalia API
Email validation service integration for verifying email addresses in Appsmith apps
Part of the Appsmith series
Verifalia is an email validation service with an API and a free plan that can be used to verify up to 25 emails per day (or more with the paid plans).
Send in one or more email addresses, and Verifalia will generate a report with all kinds of data about each address.
Now, let’s build our own email validation tool using Appsmith for the UI to integrate with the Verifalia API.
👉 Goals
-
Create new APIs in Appsmith to verify email addresses
-
Build UI to submit verifications and view results
-
Store results for each request in Google Sheets (future post)
⚙️ Build Process
Get Bearer Token
Start by adding Input Widgets for api_email and api_pw, and a button to run the POST: Bearer_Request.
Then add a new API:
POST: https://api.verifalia.com/v2.2/auth/tokens
Headers: {content-type:'application/json'}
Body: {username: 'EMAIL_ADDRESS', password: 'password'}
Next, set Button1 to run the Bearer_Request query, and save the response to the user’s local store (appsmith.store.token).
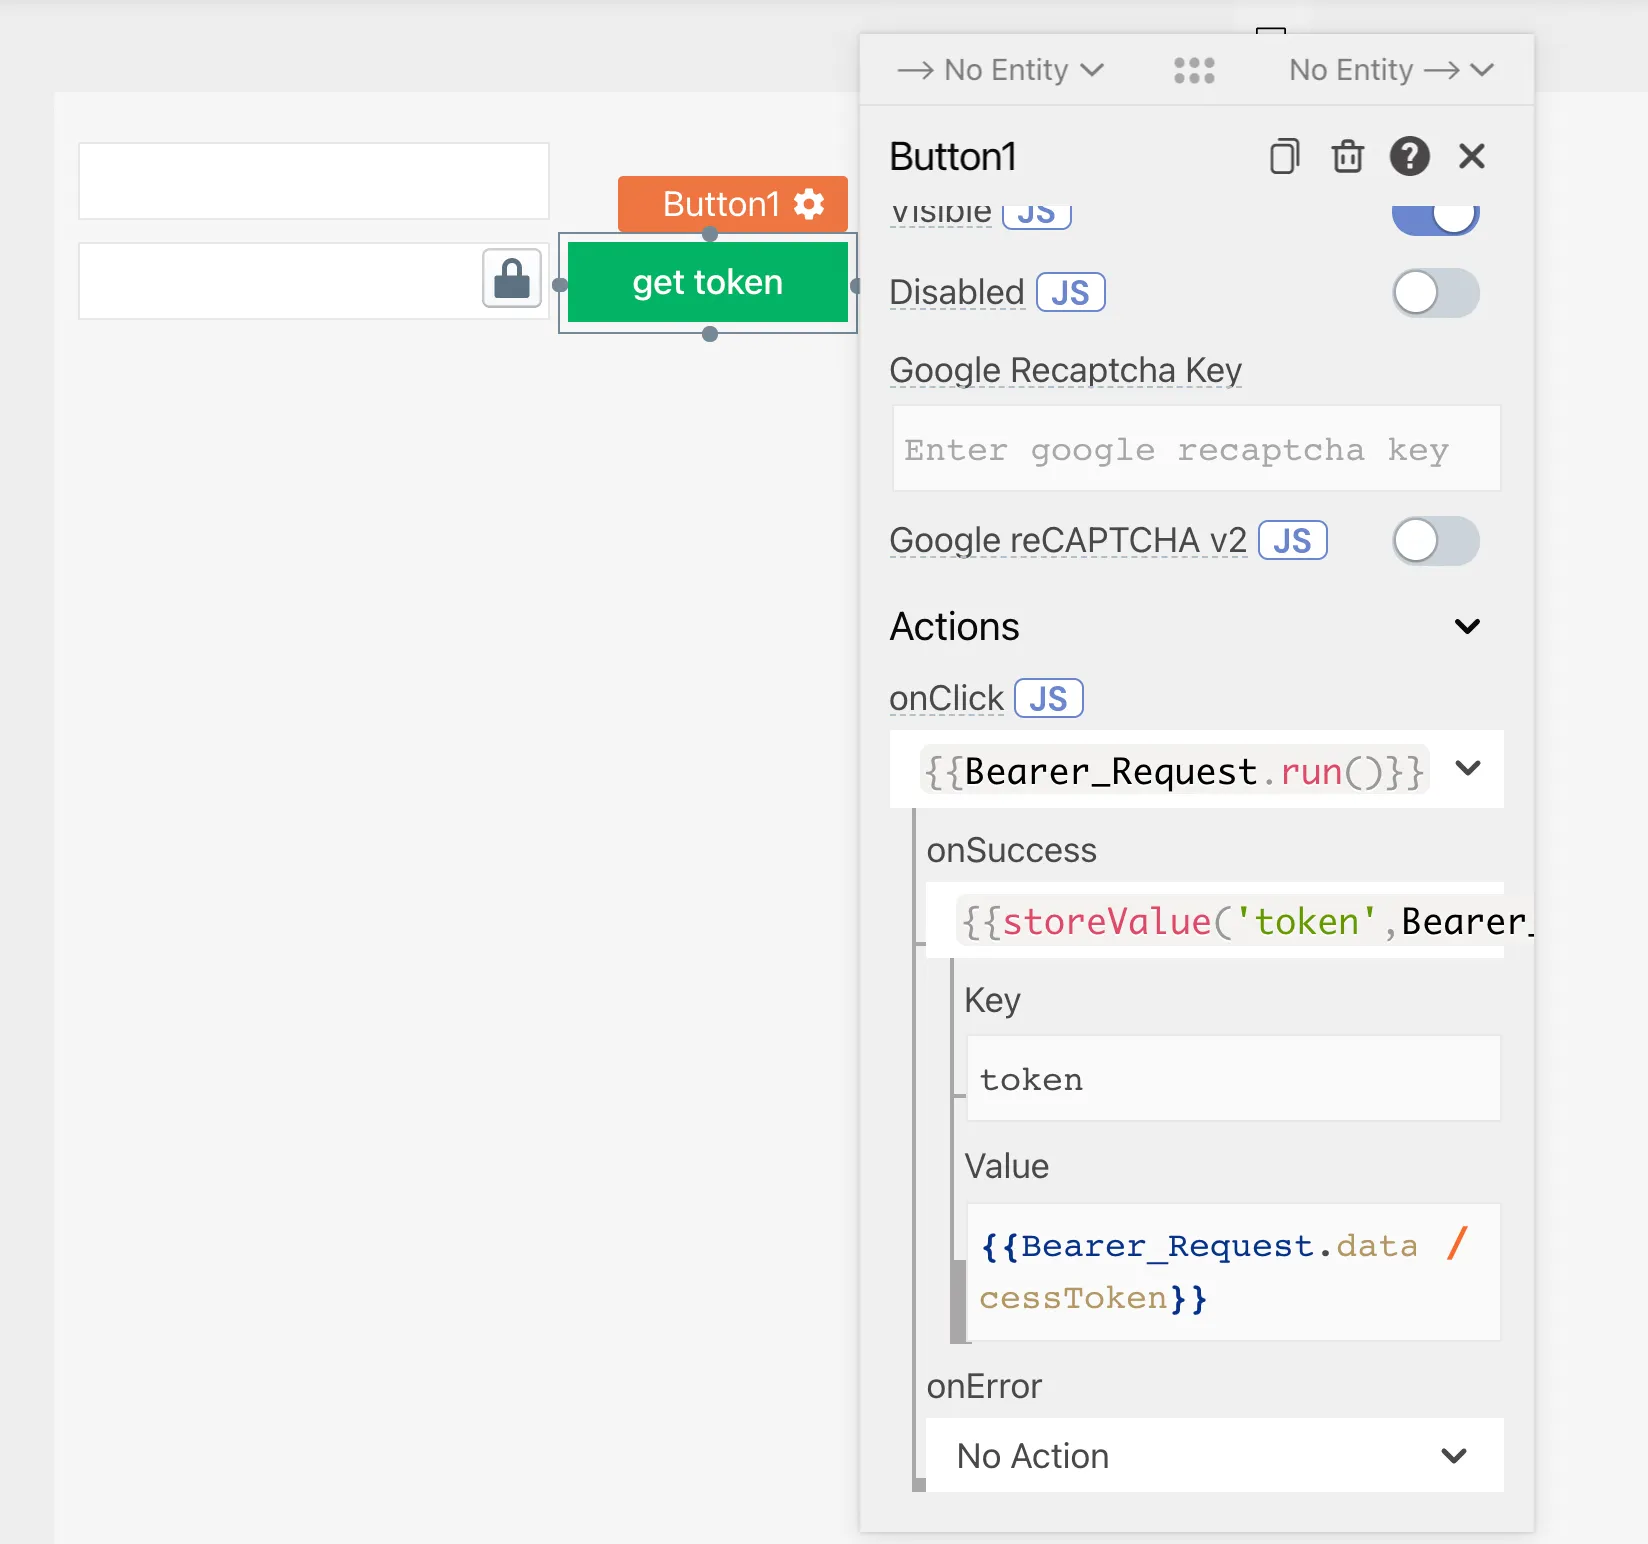
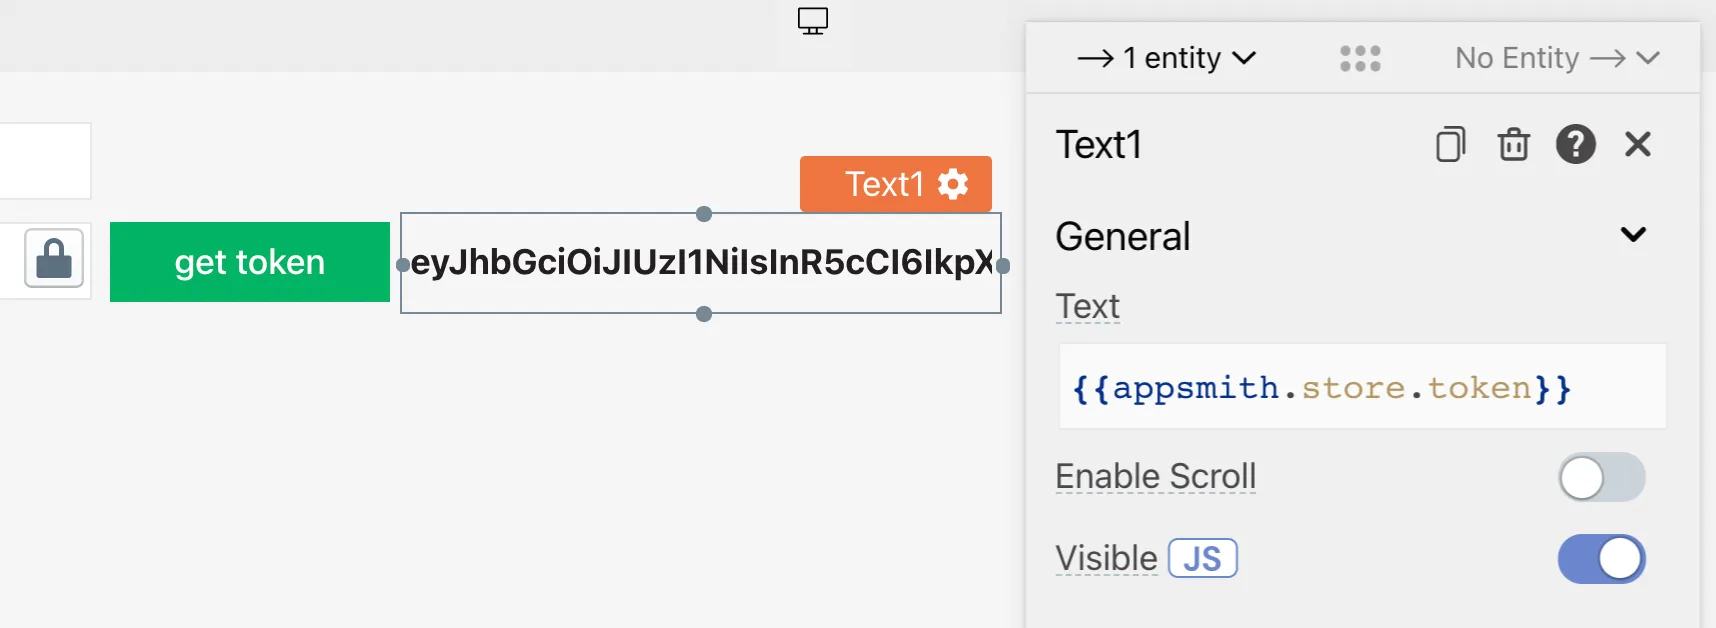
Deploy, and test to make sure the POST response includes an accessToken. If there is no error alert then you should be good to go. But you can also display the accessToken on the UI just to verify.
Send Email Validation Request
Now that we have an accessToken, we can use that in our header to make a POST request and send an email address to be verified.
Add New API:
POST: https://api.verifalia.com/v2.2/email-validations
Headers: {content-type:'application/json', Authorization: Bearer {{Bearer_Request.data.accessToken}} }Body: {
entries: [
{ inputData: '[email protected]' }
]
}
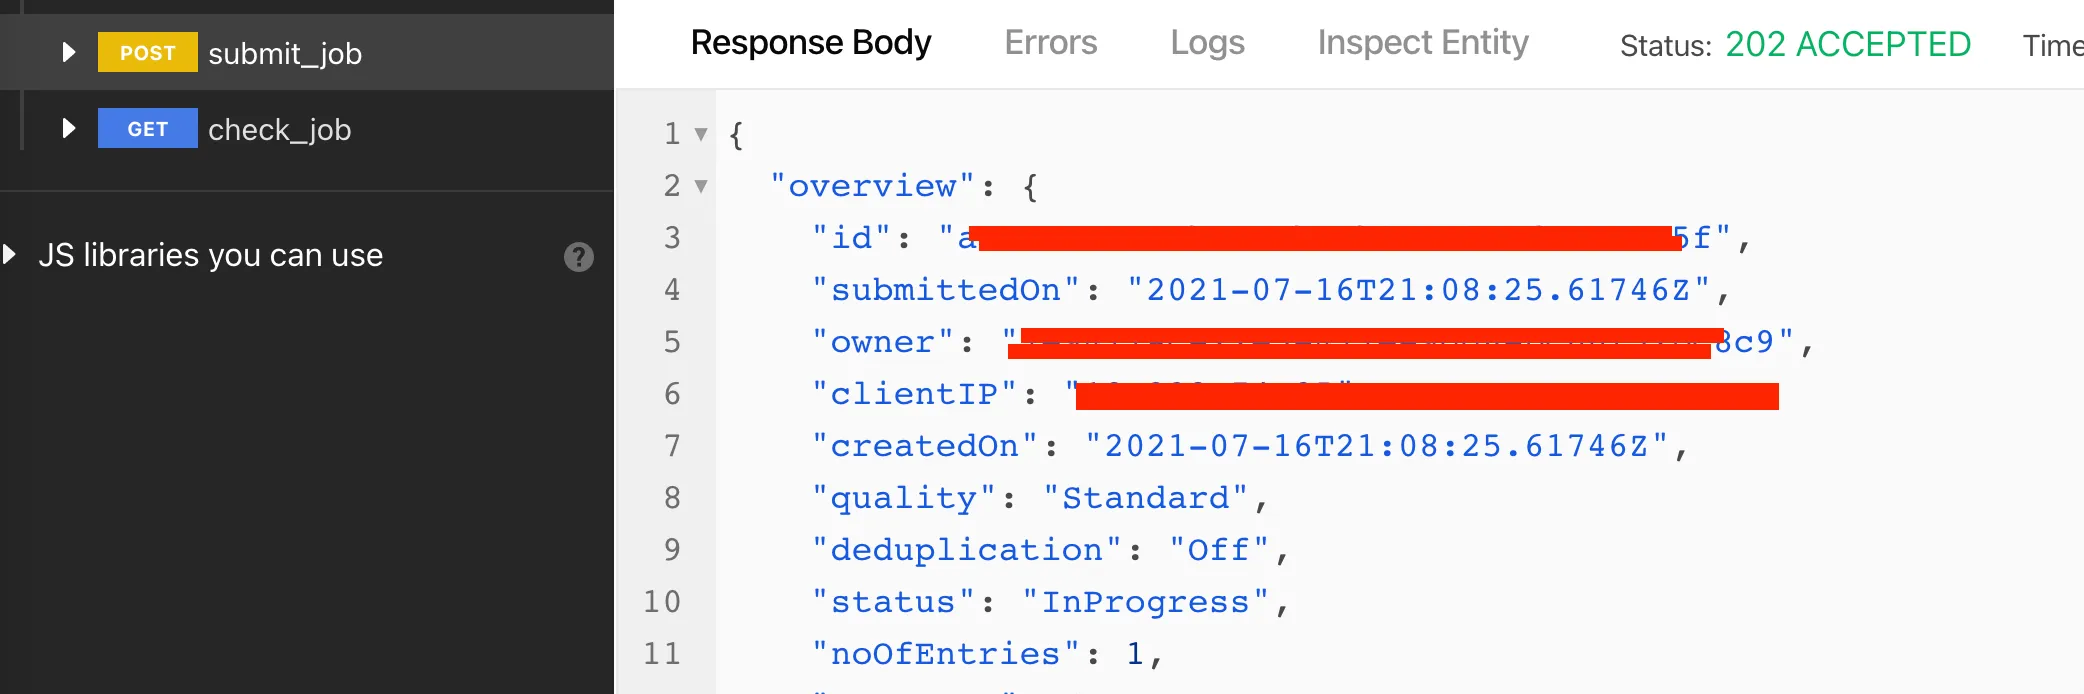
Run the new POST: submit_job and you should get back a response with an ‘id’ for the job. The request takes some time to process, so the API doesn’t return the results in the same call. Instead, you have to get the ‘id’ and then do a followup GET request to check the status.
Check Job Status
Add a new API: check_job
GET: https://api.verifalia.com/v2.2/email-validations/{{submit_job.data.overview.id}}
Headers: {content-type:'application/json', Authorization: Bearer {{Bearer_Request.data.accessToken}} }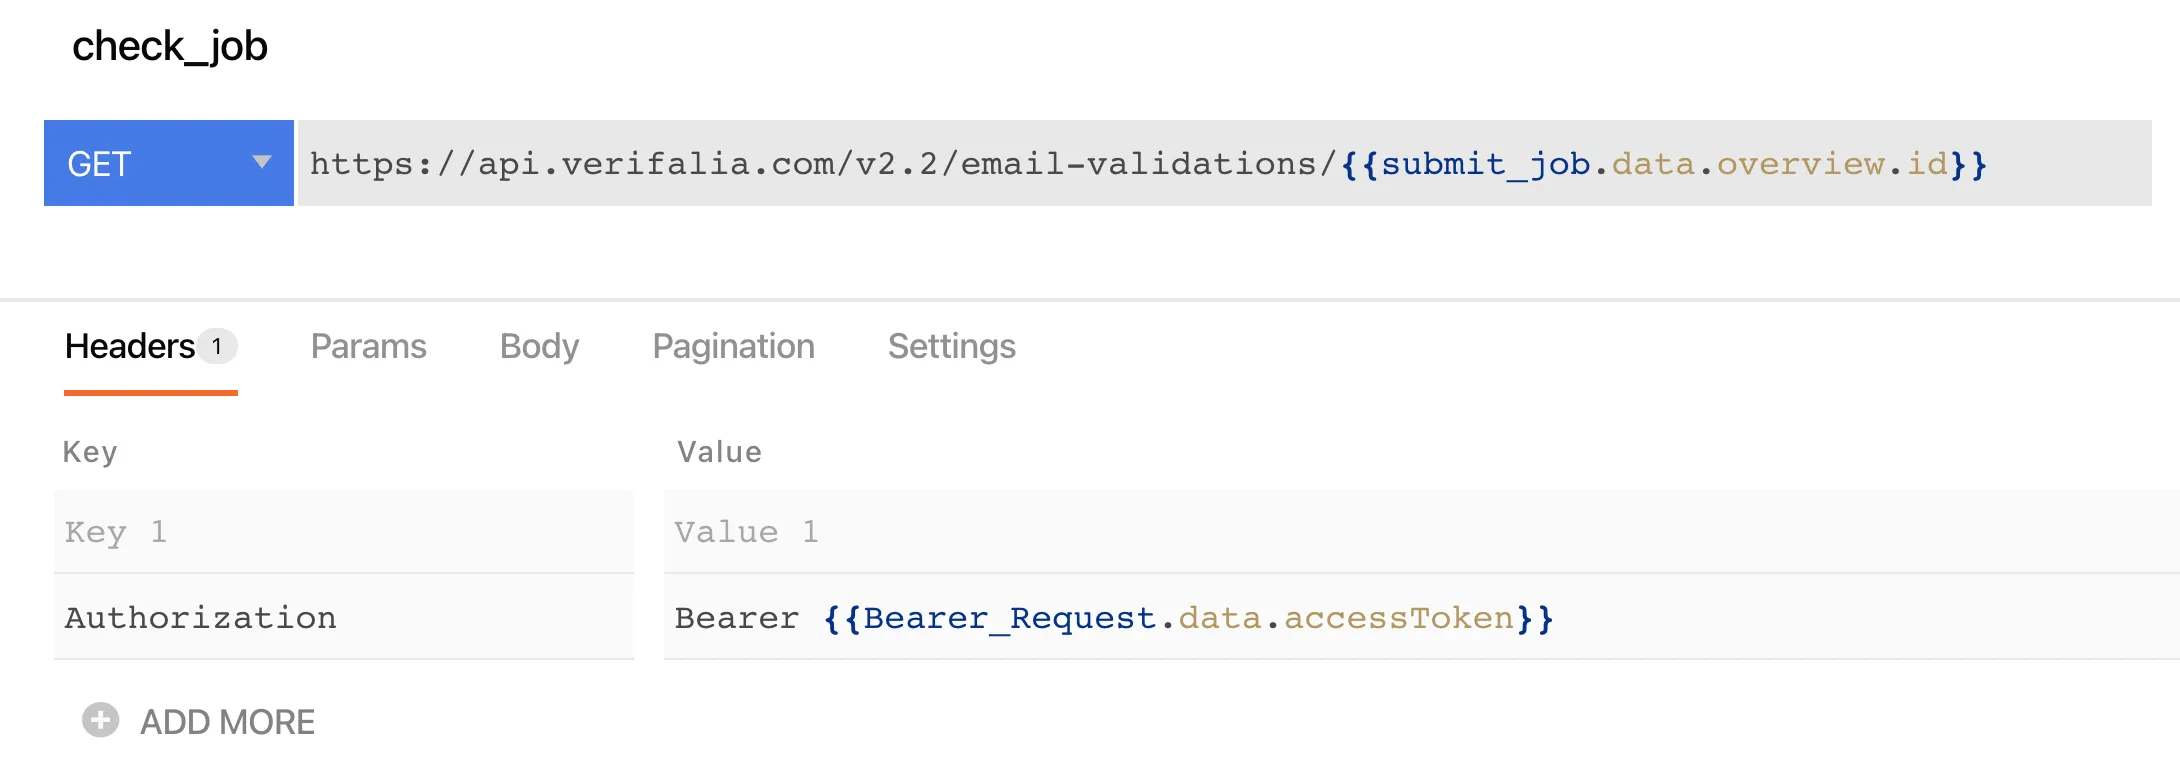
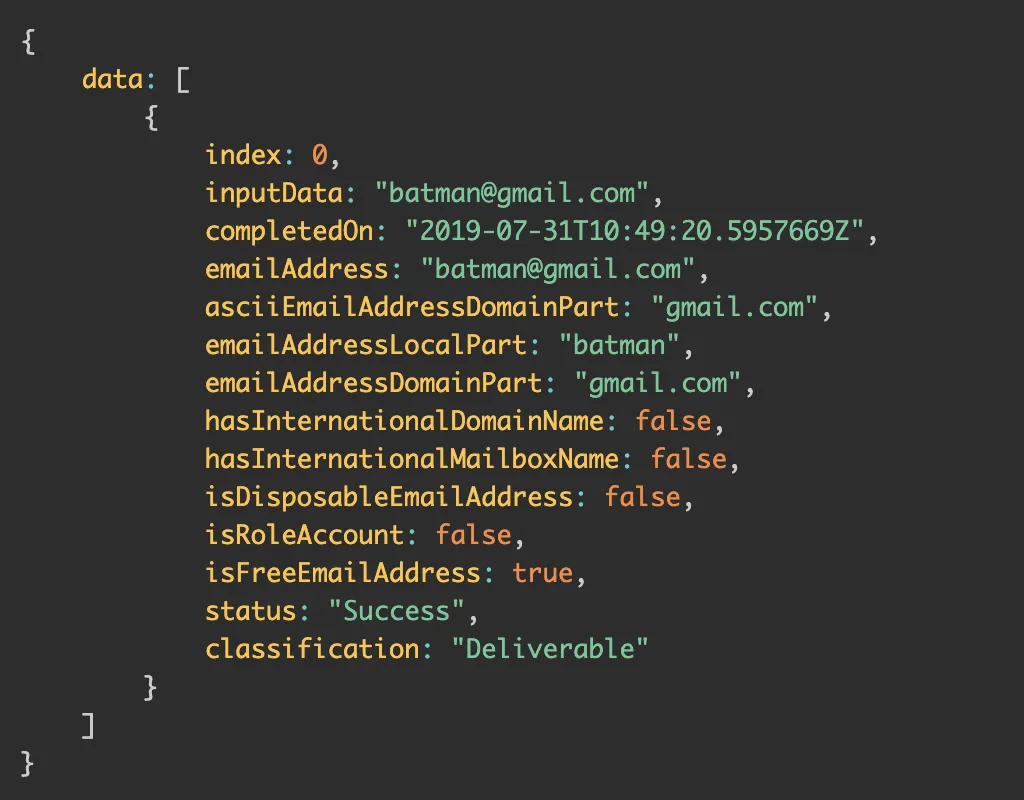
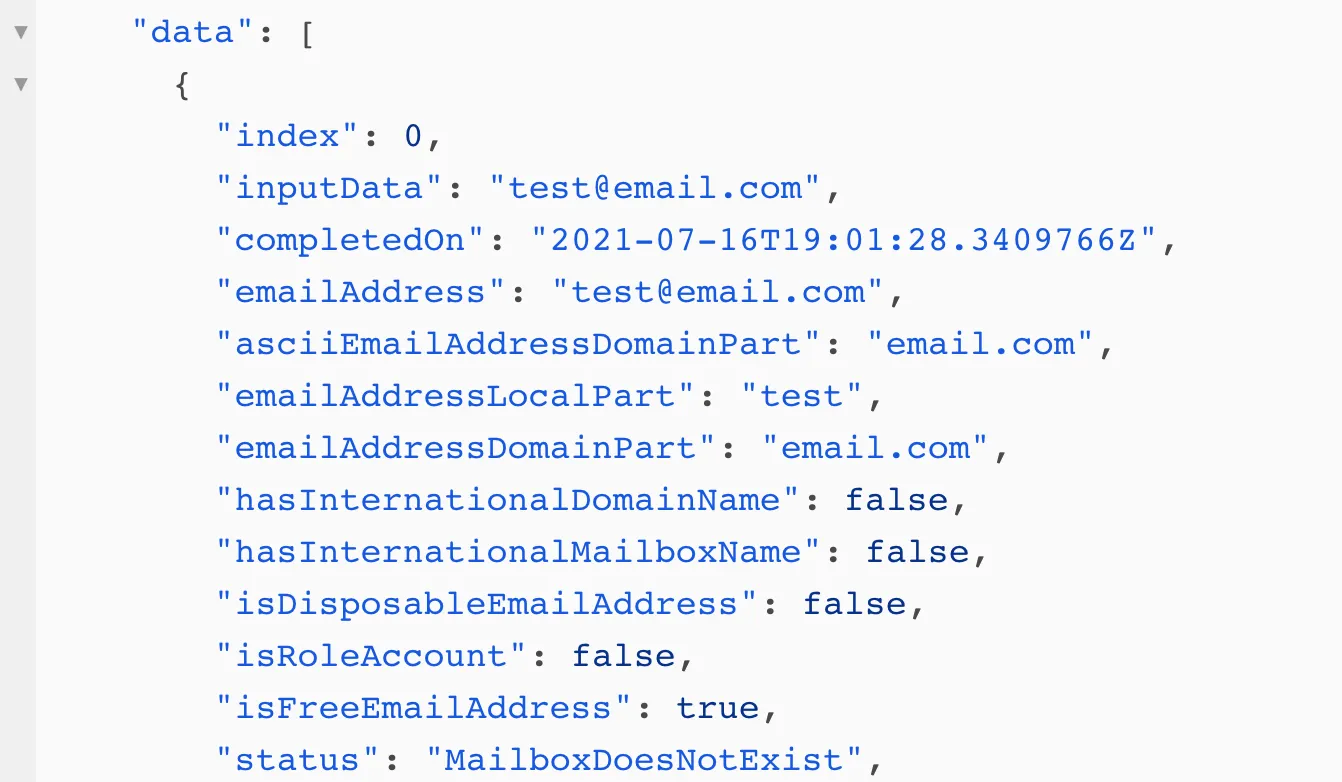
Run the GET: check_job API and you should get back a report like this:
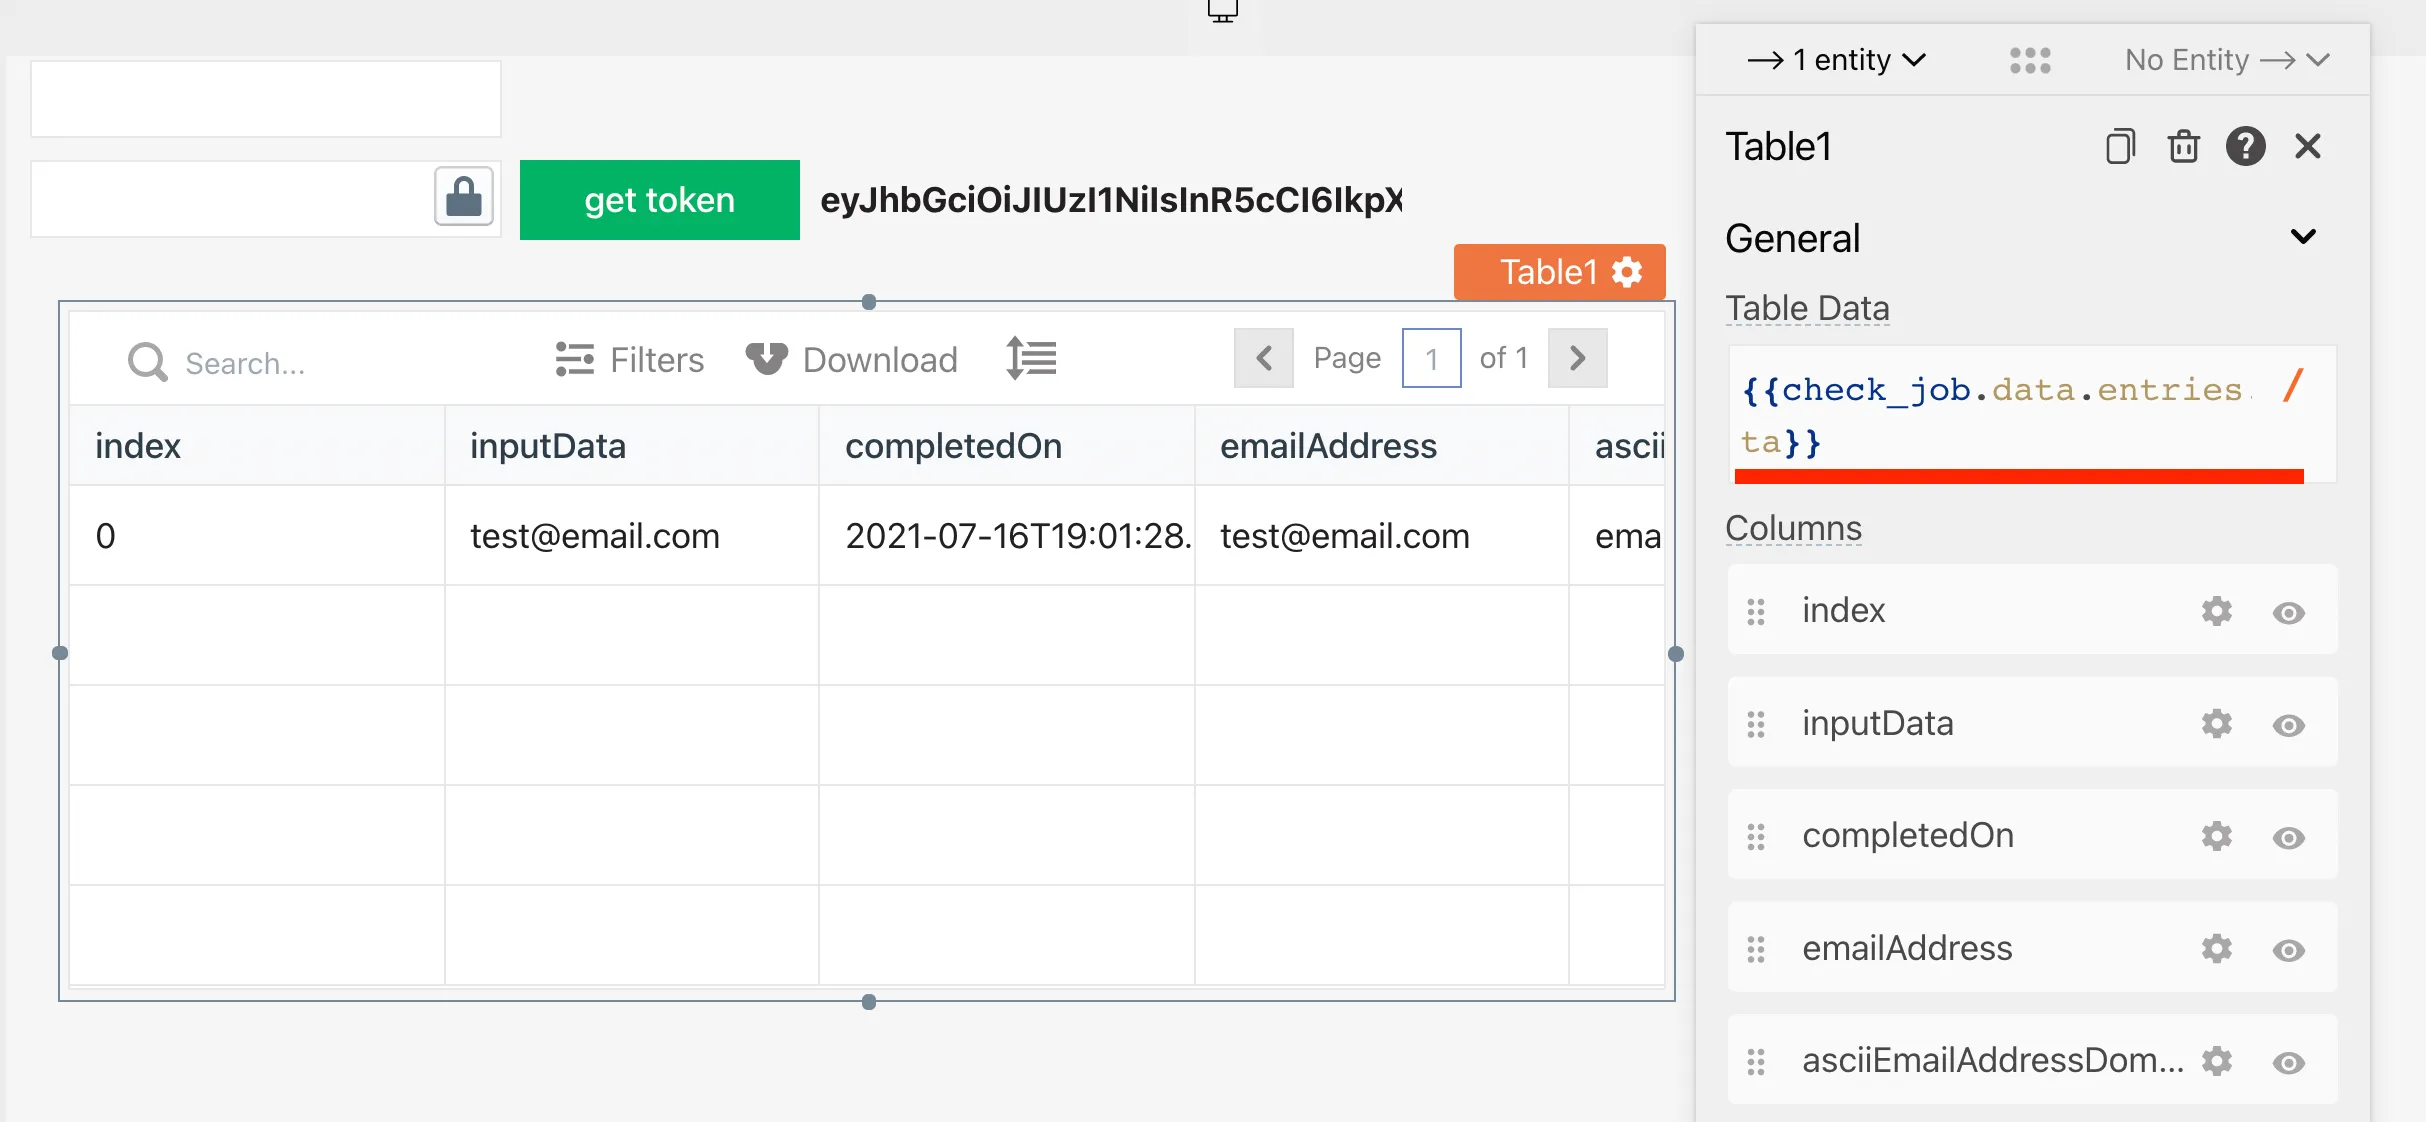
Viewing Results on the UI
Now let’s add a Table Widget to display the results. {{check_job.data.entries.data}}
Next, we can add an Input Widget to pass a new email, and a button to send another request.
And finally, a button to check the job status.
Ok, the UI could use some work, but we have a functional system for checking an emails now!
I hope this helps others figure out the authentication and formatting for using the Verifalia API. Please post below if you have any questions setting up your own email validation system in Appsmith.
Thanks for reading!